Easter Egg-Shaped Card

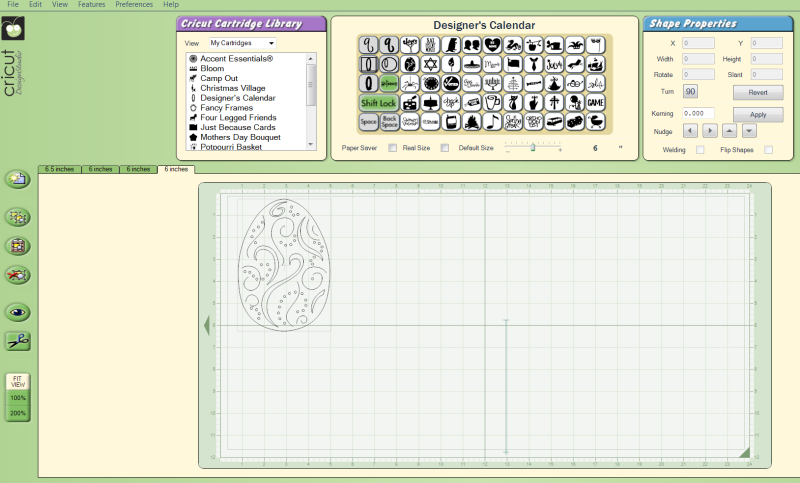
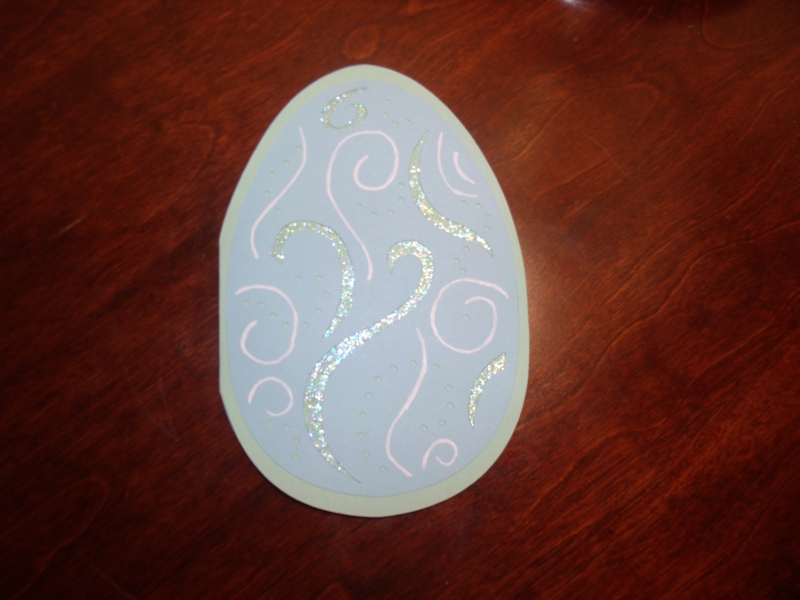
I made this Easter card for my sister and her husband. The egg is from Cricut’s Designer’s Calendar (under Events Shift). It has pretty lines and cut-outs that can be embellished with a white gel pen and glitter glue. To get the card base, I chose two eggs at 6.5 inches in Design Studio, hid the contour lines, and welded them together. Then I cut a regular egg with all of its lines and cut outs at 6 inches for the top of the card.

Easter Egg-Shaped Card

Easter Egg-Shaped Card

Egg from Designer's Calendar

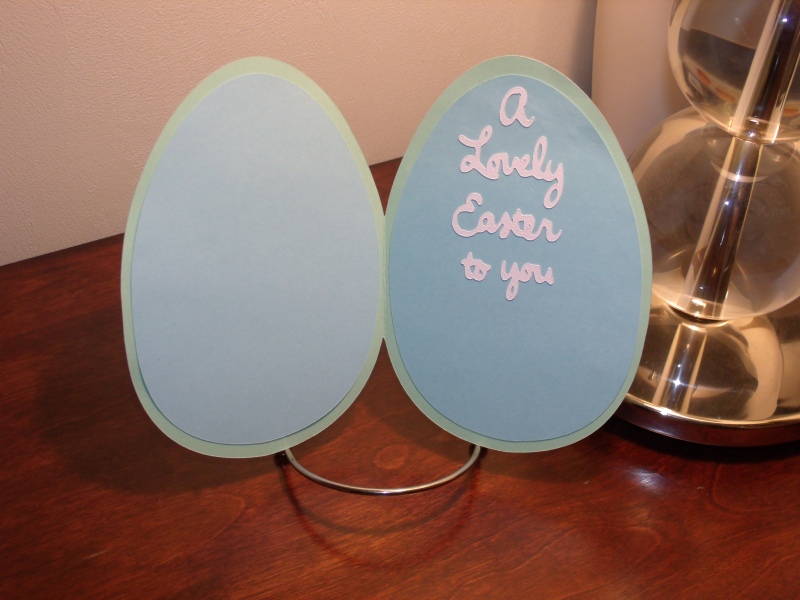
For the inside of the card, I used two 6 inch eggs, hiding the contour lines, to serve as card liners. It helped beef up the base and allowed for an area to write a message under the sentiment. The sentiment is cut from Wild Card at 6 inches using Colorbök’s white cardstock. The light blue and green cardstock is from Wal-mart (pastels).

Sentiment - Wild Card

I highlighted the cut swirls with a white gel pen and used Stardust Stickles on the cut-outs. I made a scalloped envelope from Wild Card (not pictured) cut at 5 inches which gives you a 5×7 envelope to fit this card.
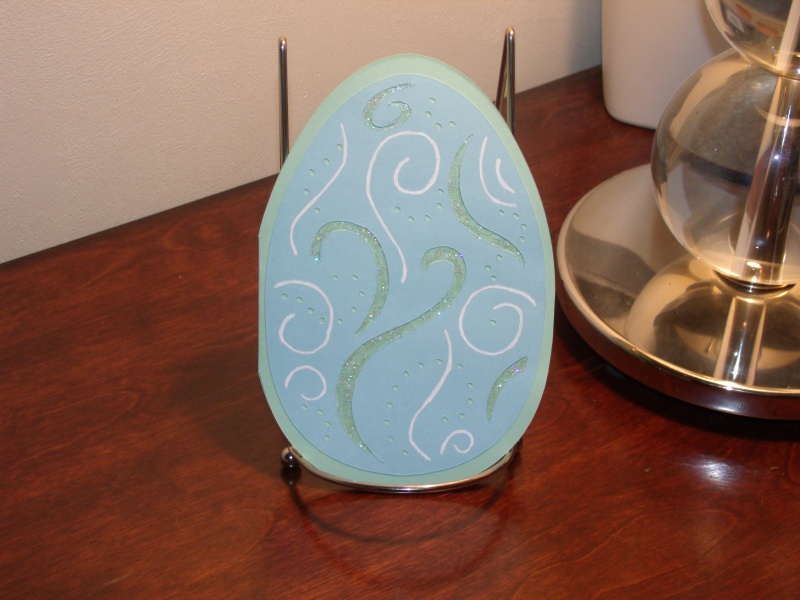
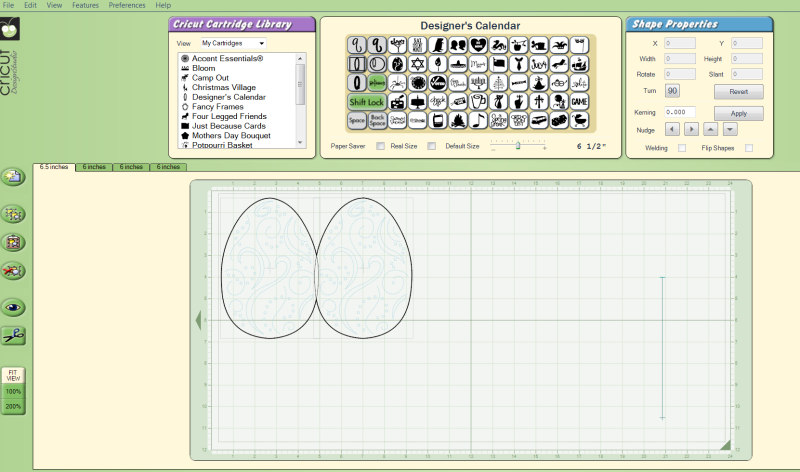
Egg - Designer's Calendar

Autumn Banner

Hi all! This will be a quick post (well, quick for me LOL), as I am still getting the house ready for our family’s Thanksgiving! I had a banner planned out since October but didn’t make it until today. I was determined to get it done, even if it’s only to be used this week! I used Cricut’s “Straight from the Nest” cartridge for the banner’s triangles and toppers which were cut at 7 1/2 inches. The banner is cut from two sheets of Paper Studio’s 12×12 “Natural Botanical” patterned paper. Here is the layout of my mat. I cut this layout twice (once in light green leaf paper, and once in brown leaf paper). It made it quick and easy.

For the letters, I used Cricut’s “Designer’s Calendar” cartridge. “A” “U” and “N” are cut at 6 inches, “M” at 5.5 inches, and “T” at 4.5 inches. I alternated the colors of the letters using beige and brown cardstock to show up well against the alternating banner colors. I also ran each letter through a Swiss Dots embossing folder before adhering. I connected the banner sections with bows made from twine. I’m not really pleased with how it’s hung – note the two neon green push pins! 😦 But it works from a distance. I couldn’t find any clear push pins and I couldn’t think of another way to hang it, so the green pins will have to do!

So that’s my first banner! I plan on making one for Christmas too. I think it adds a nice touch to the fireplace.

I am entering this banner into the following challenges:

Due to the holiday, this will be my last post for this week. I’ve got family coming in from Florida and we plan on having a nice Thanksgiving meal and visit together!

I wish you all a wonderful and happy Thanksgiving! Blessings to you and your families!

~Vanessa

Happy St. Patrick’s Day Card – Clovers with Rainbow Inspired Background

Here is a fun, bright St. Patty’s Day card using the lucky four leaf clover image from “Designer’s Calendar”. This card was trial and error admittedly but I like the end results. I scoured my 15 cartridges looking for a rainbow and unhappily realized I didn’t have one! So I changed course and decided to get creative and cut rainbow-colored strips using scrap paper and a paper trimmer. The strips are 1/4 inch wide and 4.25 inches long to fit an A2 sized card (4.25 x 5.5). I adhered the strips to white cardstock using an adhesive tape runner – adhering one strip at a time while trying to line them up evenly and close to one another. Once that was done, I used purple ink to stamp “Smile” in the upper left hand corner. I then ran the entire thing through my Sizzix embossing machine using a Cuttlebug Swiss Dots folder. I took a chance because the strips added an extra layer of paper to the white cardstock and I wasn’t sure it would turn out well, but luckily it did. So now I’ve learned a new method! 🙂 The clover images were cut at 2.5, 2, and 1 inches and are placed as if they are “falling from the sky” down the front of the card. There is a shadow layer glued directly to the card, and then a top clover that’s embossed with the same Swiss Dots folder and raised up with dimensionals (foam tape from Michael’s). Buttons and jewelry cord finish the look. For the inside, I cut sentiments from “Straight from the Nest” (Happy) and “Designer’s Calendar” (St. Patrick’s Day). I used a corner rounder punch on the top corners of the white mats and the light green card base.

Tip: For anyone wondering how the buttons were adhered, I used glossy accents on the smaller buttons because it helped the jewelry cord stay in place. Jewelry cord is rather thick and doesn’t knot well so I threaded the front of a two-hole button and then trimmed the ends that stuck out at the back of the button. Since I was not going to knot the cord in place, I used glossy accents and my fingers to flatten and glue the ends to the button. Then I dabbed on more glossy accents to the back of the button and glued it to the clover. The larger button allowed me to just tie a bow with the jewelry cord. The back was flat enough to be popped up on the clover using a large circle dimensional. After this experience, I want to buy embroidery floss the next time I’m at a craft store! It would make threading and adhering buttons so much easier!

Thanks for looking!

Vanessa

“Not a Creature Was Stirring, Not Even a Mouse”

I love this card! I made this for my husband’s daughter who is an adult but loves the excitement of Christmas as much as I do. I thought she would get a kick out of this fun Christmas card. The mouse is cut at 3 inches from Four Legged Friends. I used the Christmas Village to cut the presents at 2 inches and the tree at 4 1/2 inches. The piece of candy is from Designer’s Calendar cut at 1 inch. The light green cardstock mat is from Michael’s Recollections Sugar Plums stack and it repeats part of the “The Night Before Christmas” story: “The children were nestled all snug in their beds, while visions of sugar-plums danced in their heads”. I used various glitter glues, Glossy Accents, and Stickles to highlight the presents and tree ornaments. The ribbon and the 5×7 card base are from Hobby Lobby’s The Paper Studio line.

Thanks for looking!

Vanessa

A Quiet Autumn Scene – Thanksgiving Card

I wanted to capture an autumn scene and show the beauty that this wonderful season offers.  This card is dedicated to my husband, Glen in honor of our wonderful Thanksgivings together and the ones to come.

Cartridges used:

Bloom, Designer’s Calendar, Pagoda, Storybook, and Wild Card

Papers Used:

My Mind’s Eye Simply Delightful (colored paper), Wal-Mart card stock (card base), Paper Studio’s Natural Botanical card stock (brown paper)

Embellishments:

Swiss Dots Cuttlebug Folder; Inking using Stampabilities brown ink; Shading using a brown colored pencil

I made a 5×7 card base, then trimmed light blue paper to 5×7 and adhered it to the front of the card. Next I cut a 5×7 mat of light green paper and used a pencil to sketch hills.  I used scissors to cut around each hill, embossed them with a Swiss Dots folder, then inked the edges with brown ink and a Q-tip for definition.  I then adhered the hill pieces to the blue mat fitting them like a puzzle.  I cut the “Bloom” tree trunks (both kinds on the cartridge) at 3 inches using brown card stock and cut one layer of leaves in orange paper for the larger tree.  I cut extra leaves in orange paper at 4 inches so they would appear larger as they fell to the ground and could be used on the other trees.  The pumpkins are cut at 2 inches from Designer’s Calendar.  I used a brown colored pencil to color in the stem and make ridges in the pumpkin.  I also applied a bit of ink over these for more dimension. The bridge is cut from Pagoda at 1 1/2 inches.  The inside sentiment was done on my computer using Edwardian Script. I cut a 1 inch owl from Storybook and some maple leaves from Wild Card at 3 and 1 inches.

Wild Card’s Leaf Card – Thanksgiving

I made another Thanksgiving card tonight using Cricut’s Wild Card cartridge. On page 43, there is a nice card base called. Other images for this card include the “Happy Thanksgiving” sentiment and leaf icons. I really like the oval cut-out and the coordinating scalloped frame. I cut all of the corresponding cuts at 7 inches, including the envelope. The envelope is embellished with a leaf icon cut at 7 inches in green card stock. I used a paper trimmer to cut off the excess where the leaf folds over to the addressed side.  Since I will be mailing this card, trimming the leaf portion was necessary. The two charms hanging from the jewelry cord are cut from Cricut’s Designer Calendar cartridge at 1 1/2 inches (pages 36 & 37 for the images, and 47 for the round and square bases). The patterned card stock is from Paper Studio’s Natural Botanical stack and the card base is from Wal-Mart’s 8 1/2 x 11 earth tones card stock found in their office supply section.  I added two small adhesive pearls on the scalloped frame to finish off the card.

I have one more Thanksgiving card that I need to make and it doesn’t require mailing.  It is to be given to my husband who is so loving and supportive of my hobby.  I have a design in mind and hopefully I can get it completed tomorrow.

Till then,

Vanessa

Thanksgiving Pumpkin Card

Here is an A2 sized pumpkin card made out of oval shapes from the Wild Card cartridge.  I used the oval liner on page 39 and hid the contour line inside the oval frame using Design Studio.  I cut three separate ovals at 3 inches. I also welded three 3 inch ovals together to create a pumpkin shape.  I used a tape runner to adhere the welded pumpkin shape to the card base and then glued the left and right ovals on top, saving the middle oval for last which is adhered with foam tape to raise it up for dimension.  The welded pumpkin shape is not necessary to make a pumpkin out of individual ovals.  I just wanted the extra layer, plus it made it easier for me to just lay the individual ovals on top based on the welded “template”.

For the inside of the card, I welded three 1 inch ovals together to achieve the small pumpkin.  Click here for a Design Studio screen shot showing the ovals used for this card. I experimented with different sizes (1, 2, and 3 inches).  You can see the individual ovals colored in orange.  The welded ovals are clear but have a darker line around the shape. This darker line shows you how it will cut in preview mode.  I only used some of the shapes so I have a few extra for other cards.

The pumpkin on the front of the card is embellished with “stitches” using a white gel pen. The pumpkin stem is from Wild Card’s Halloween Jack-O-Lantern card on page 68.  I cut two sizes at 2 and 4 inches.  I trimmed the stem for the larger pumpkin with scissors (out of necessity).  It was going off the card so I trimmed it a bit :).  The stem has come in handy for my 3-D pumpkins, Halloween card, and now this Thanksgiving card.  The lovely green patterned card stock is from Paper Studio’s Natural Botanical stack.  The light orange card stock is from Colorbok which can be purchase at Wal-mart in a 12×12 (30 page) pastels pad for $5.00.  The ribbon is from American Crafts.  The inside “Give Thanks” sentiment is cut from Designer’s Calendar at 1.5 inches.

Thanks for looking!

Vanessa