It has to be romantic… and masculine?

So, my husband and I will be celebrating an anniversary soon and it’s time for another masculine card but one that also expresses LOVE. Sigh! I’m starting to think that a romantic masculine card is the trickiest of all the masculine card categories! When my creative well runs dry, I tap into inspiring sources. Usually a quick tour through Pinterest ends the drought, but sometimes it’s just good to visit your blog pals. It’s amazing how many delightful and inspiring cards are hiding in people’s blogs of all places! ๐Ÿ™‚

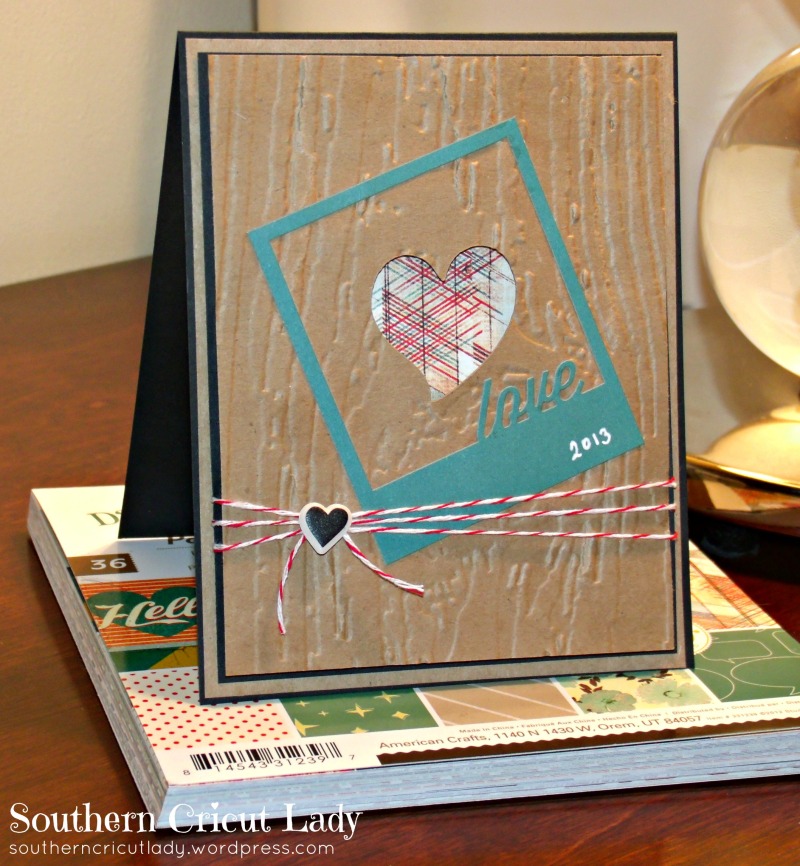
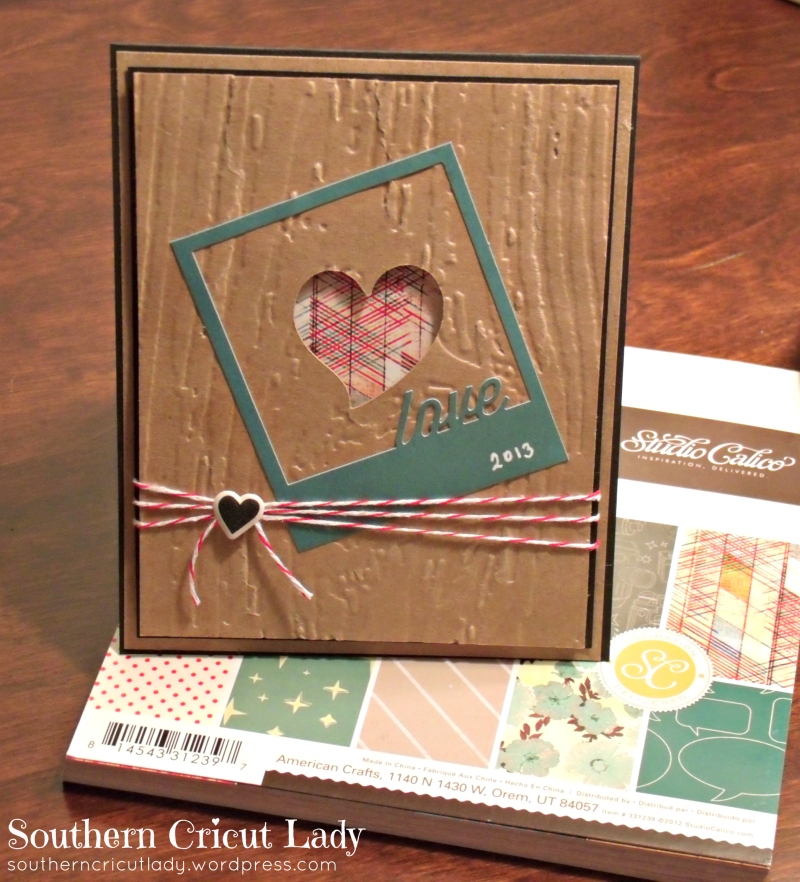
So with renewed vigor, this is what I came up with after being inspired by Sarah at The Handmade Card Blog. Please check out her elegant anniversary card here. I love her patterned paper choices underneath her punched out hearts and that gorgeous woodgrain paper from Simon Says Stamp. I tried to mimic the look using a woodgrain folder by Tim Holtz but used a darker palette of kraft cardstock framed by mats in black.

Studio Calico Polaroid frame; Cricut Sweethearts heart

Recipe

  • Kraft and black cardstock (A2 sized card)
  • Sizzix Texture Fades Tim Holtz – woodgrain embossing folder
  • Heart aperture – Cricut Sweethearts cartridge (2.5 inches)
  • Studio Calico “Yearbook Collection” Polaroid Die-Cut Frame
  • Studio Calico “Darling Dear” 6×6 patterned paper (underneath heart aperture)
  • Amy Tangerine Remarks “Cute Overload” Puffy Heart Sticker
  • Red Baker’s Twine (Martha Stewart)
  • White Gel Pen (wrote in the year)
  • Dimensional Adhesive

Masculine Anniversary Card

Sending wishes that you’ll be inspired by someone or something today!

Vanessa

Two Hearts – Anniversary Card

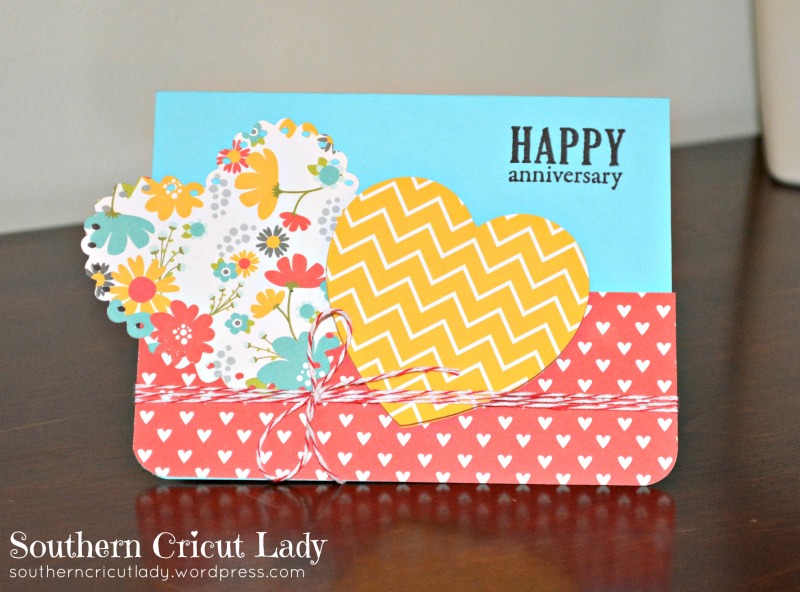
Here is an A2 anniversary card I made for my parents’ 46th wedding anniversary! It’s a simple card with only two die-cut hearts from the Sweethearts cartridge but I think the colorful paper does the rest. The pretty blue card base is from Michael’s Recollections Preppy Beach cardstock and the cheery patterned paper is from American Crafts’ Pebbles Seen & Noted.

2heartsanniversary

I love the chevron paper! Is that an old trend now or did I make it in time! ๐Ÿ™‚ I cut two of these chevron hearts at 2.5 inches – gluing one onto the card and popping the other one on top with dimensionals. I offset the left heart cut at 3 inches to have it go off the page a bit. I’m liking this style.

I used Fiskars All Year Greetings Stamps and StazOn Black Ink for the sentiment and a corner rounder on the bottom edges. I finished it off with baker’s twine from Martha Stewart.

The timing of this anniversary card withย Jo’s Fun-day Friday Challenge worked out great! FFC #4 is “Anything Goes!!!!” To check out the challenge on Jo’s blog, click here.

Thanks for looking!

Vanessa

“Special Delivery” Anniversary Card

Hello all ~ I made a card for my sister and brother-in-law’s upcoming anniversary. They have an autumn anniversary so I played on the idea of autumn leaves but kept the card’s colors bright and playful to fit any occasion. I love the stamp image on Wild Card so I played on the theme of “Special Delivery for two special people” which is the inside sentiment that I typed in Word. The special delivery design can be seen in the stamp mat, the postal mark I made in Word, and in the miniature envelope filled with autumn leaves. It’s as if the envelope idea is deconstructed – envelope, then postal mark, then stamp. It was fun ย playing with these elements to design a card for a special event.

The stamp image on Wild Card is found under the alphabet feature. It normally has an inner cut that reads “stamped with love” but I hid these lines to just get the stamp shape cut at 4.5 inches. I then added a square mat measuring 4 inches which I ran through my printer to print the postal mark. I sewed these two layers together with a zig-zag stitch (this is the second time I’ve sewn a card so it’s not perfect! ๐Ÿ™‚ ). I cut the cute envelope at 2.5 inches from Just Because Cards and the leaves are from Potpourri Basket cut at 2 inches (these are originally from Doodlecharms). The card base is 5 inches square so I cut an envelope from Walk in My Garden at 5 inches to mail it to my sister! The leaves are doodled with a fine point black pen and distressed with brown ink. I then embossed them with Cuttlebug folders – D’vine Swirls and Swiss Dots. I added a little bow to the envelope with a glue dot.

I am entering this card into the following challenges:

http://fantabulouscricut.blogspot.com/2012/11/challenge-me-monday-136.htmlย (Fall Harvest – Make a project using Fall leaves) Deadline: Midnight November 11 (MST)

http://cardztv.blogspot.com/2012/11/attitude-of-gratitude-cricut-cardz.htmlย (Attitude of Gratitude – Make a card for Thanksgiving using any cartridge(s), and any colors youโ€™d like) Deadline: Noon November 20 (EST)

Pagoda Dragonflies

Hello! ย I made another anniversary card using Cricut’s Bloom cartridge for the tree branch and the Pagoda cartridge for the dragonflies. ย This is the second anniversary card I made for my sister and her husband. ย The first one was the Kraft colored card with the topiary. ย I was in the mood today to make another card, this time featuring dragonflies which my sister will appreciate. ย She loves collecting frogs and dragonfly decor. ย For this card, I couldn’t resist adding a lot of embellishments. ย I used a Sizzix Swirls & Dots embossing folder, adhesive gems from K & Company, and Star Dust Stickles to add shimmer to the dragonfly wings. ย The card base is 5×7. ย The branch and the dragonflies were cut at 2.5 inches. ย The pastel blue and green paper is from Colorbok available at Wal-mart.

Thanks for looking!

Vanessa

Anniversary Card – It’s Your Day

Hi all, this is an anniversary card I made last night.ย  I tried out my new white gel pen and Glossy Accents.ย  Papers used are Kraft and brown card stock (Paper Studio) and Simply Delightful (My Mind’s Eye).

Cartridges used:

Bloom ~ topiary (3.5 inches) and Live, Love, Grow sentiment (1 inch)

Walk in My Garden ~ card base (5 inches)

Storybook ~ marquee frame layers (4 inches)

Wild Card ~ It’s Your Day sentiment (7 inches) and rings welded to sentiment (2 inches)

Decorative Details:

I used foam tape to pop up the topiary and sentiments.ย  I used Glossy Accents on the topiary flowers and ring bands.ย  On the diamond, I used the white gel pen and then applied Star Dust stickles for shimmer.ย  I also used the white gel pen to outline the topiary and to embellish the sentiment on the inside of the card.ย  For the Kraft card base, I used the Swiss Dots Cuttlebug folder and used a scorer to score three lines running along the bottom.ย  The card is finished off with light green ribbon and a button threaded with pink jewelry cord.

Thanks for looking!

Vanessa

“Me + You = Forever” Anniversary Card

Sorry that it’s been a while since I’ve posted. I hope everyone had a great Fourth of July! My husband and I went to Florida for the July 4th holiday to visit my sister, brother-in-law, and mother-in-law. We also saw my other brother-in-law, his wife, and their two children. We had a wonderful time filled with delicious food and great laughs. It was great to see them again! During the trip, my sister and I went to a local aquarium and had a lot of fun looking at sharks, jellyfish, seahorses, and clown fish. It reminded me of our college days when we went to an aquarium any chance we could get. We always had a blast!

Now we are back home and settled into our routine but there is one more special occasion for me and my husband! We will be celebrating our 9th wedding anniversary very soon! Seems like yesterday when we first met. I made this card reminiscent of young loves etching their initials in a tree. I changed it up a bit by hanging a heart sign from a tree with our initials on it ~ G + V. I wrote the sentiment for the inside of the card and typed it in Word using an oval-shape text box. The font is Batik Regular in light blue and I love how it looks like it came from a typewriter. I changed the oval’s border style and color to a tan stitch border. I cut a 4 1/2 inch oval from Cricut’s Storybook cartridge on cream cardstock and then taped the oval to a sheet of copy paper to get it to print the stitches and message appropriately. It took a couple of tries to line everything up but I am pleased with the result. I hope Glen likes it. It usually takes me a while to complete a card because I tend to over think every decision, but I guess that means I’m either a perfectionist or I just want it to be as special as it can be for the one I love. The front of the card is cheery with blue skies, fluffy white clouds, and two love birds sitting in the tree with our heart sign. There is also a wooden sign from Cricut’s Walk in My Garden (WIMG) cartridge that reads “love” thanks to the help of Cricut’s Design Studio. For the inside of the card, I embossed a Martha Stewart image of a bird sitting on a branch, using brown ink and clear embossing powder and then heat set it to make it glossy.

What do you do if you don’t have any clouds on any of your Cricut cartridges?ย Well, that is what happened to me in this case. I was so determined to have clouds on my card that if I couldn’t modify an image in Design Studio I was going to free-hand some clouds with scissors. Fortunately, I found a tree top image from my Wild Card cartridge and was able to “modify” it in Design Studio. The tree icon intended for the owl card’s envelope can be turned into a cloud by using the ‘hide selected contour’ feature to hide the smaller half of the split tree top. Repeat this step again with another tree top and then rotate it until it’s upside down, and with a bit of maneuvering and welding, you get a passableย cloud. I made two clouds for the front of the card. Do you think it’s passable? I think it worked out ok. For screenshots of how the cloud was formed, check out this pdf – Cloud Tutorial Using Wild Card.ย  To add some texture, I embossed the clouds with a D’vine Swirl Cuttlebug folder.

If you would like more details on the overall card, leave me a comment and I will give you the exact measurements.

Thanks for looking!
Vanessa
Love Birds Anniversary Card

Love Birds Anniversary Card

I made this card for my parent’s 44th wedding anniversary.ย  I love the fun, brightย paper from Paper Studio’s Poteekaย Soufflรฉ stack and I got inspiration to do a ‘love birds’ card when I saw the colorful birds with hearts paper.ย  The paper looks retro so I went with the tweety bird icon found on Wild Card to go with the look.ย  It kind of reminds me of the Partridge Family’s bird symbol ๐Ÿ™‚ .ย 

โ™ฅWalk in my Garden Cartridge

Pg 129 Card base <card2> cut at 5 inches shadow

Pg 128 Card face with window cut at 5 inches

  • The Paper Studioโ€™s Poteeka Soufflรฉ paper for card face
  • Wausau’s Mocha Mix โ€“ Royal Laid Natural cardstock for card base

โ™ฅWild Card Cartridge

Anniversary Card Sentiment

Pg 47 Icon shift (tweety bird) cut 2 birds at 2 inches (flipped one)

Pg 67 Liner heart cut at 1 inch and cut again at 2 inches

  • The Paper Studioโ€™s Poteeka Soufflรฉ paper (pink and lime green)
  • Stardustย Stickles for the birdsโ€™ eyes
  • Lime green ribbon โ€“ Paper Studioโ€™s Pastel Ribbon Scrap Pack

โ™ฅStorybook Cartridge

Pg 69 Happily Ever After <EverAftr> base cut at 3 inches; then press shift <Ever-s> cut at 3 inches

Pg 69 Happily Ever After in shadow cut at 3 inches

  • The Paper Studioโ€™s Poteeka Soufflรฉ paper (pink and lime green)
  • Wausau’s Mocha Mix โ€“ Royal Complements Umber cardstock for the shadow